The Queen of Kitchen Disasters

As much as I love to cook and bake, I'm lazy and I'm horrid at following recipes. Together with my natural capability of clumsiness and inability of handling anything sharp, it's the perfect recipe for ... disasters.

Monday, January 30, 2006

the alcohols in my life ...

For people who know me, sometimes I tend to enjoy alcohol a little too much ... but hey, I'm past the wild days of "youth" and besides I was sipping wine way before it was the "in" thing to drink these days! Basically, alcohol is no stranger to me, for almost my entire life.

I started young ... probably by 4 or 5, i was onto Tia Maria and Kahlua (courtesy of my mum). In fact, I liked it so much, I was swigging it from the bottle ... IN SECRET. Apparently I would hide behind the big armchair in the study room before bedtime, and quickly chug down a few mouthfuls and appear innocently and go to bed. The cool thing was, stories books and the bottles of Kahlua were placed side by side BEHIND the armchair. So that explains to those who was curious how I managed to acquire the "sweet" taste of Kahlua neat or on the rocks that start and end my drinking session.

Then as I got slightly older, the variety I got was much wider. Brandy (Loius XIII anyone?), red wine, white wine (my dad used to buy a crate or 2 and share with my uncle Macolm - supposedly from Provinage's father), Baby cham and ... Boones Strawberry wine (we did try Bailey's one of the year but it was never drunk again within the family).

Boones Strawberry wine was something we (my siblings and me) looked forward to, since we only get it during Christmas. Not sure what it is? Go to http://www.lovotti.com/brochures/Boones%20Farm%20Strawberry%20Hill.html. The packaging is quite different from what we get here. Along the way, it dropped out from our list of drinks, not sure why though.

Then some 10 years ago, I tried it again and the taste seems to have changed with the revamped packaging. Didn't taste as nice as before and so, of course I was quite disappointed. Kinda an "end" to my childhood memories.

However, an ending always begets a new beginning. So, I discoved Sun Peak Peach, which is GOOD! And as with all alcohols in my life, it celebrated good and bad times with me, as well as bringing me fond and not so pleasant memories.

Whatever they are, I treasure them in my heart. For that, I propose a toast, "to all the alcohols in my life, thank you for being with me." Yes I'm sober and No I'm not an alcoholic.

Psst, by the way, it goes well with desserts, in case you are wondering what it has to do with food ;)
Wednesday, January 25, 2006

overdose of cookies

my goodness ... went shopping for clothes today and i couldn't wear so many things!
 
1. free size ain't free size to me =(
2. "sorry mam, we are out of XL" (should i take comfort in that fact other people are also buying XL?)
3. clothes that look good on mannequins, that has my size, makes me look like a PREGNANT woman ...
 
*argh* this comes from gorging on the CNY goodies i guess =(
 
anyway yesterday went home and made somemore cookies with my sister and my auntie (my cousin and bro helped out too). Rascal was busy vacumming the floor and hence he had diahorrea this morning. Serves him right, but poor me, I had to clean up all the goo!
 
We tried a few recipes - the peanut cookies (but taste different - must rem wat my hubby add to the ingredients!), Sugee/ Semolina cookies (so so), Almond cookies (adapted from Skinny Epicurean's Cashew Cookies - not that fantastic *sigh* guess it doesn't work with almonds. We figured it will taste nice with those red and green cherries - experiment another time and let you know), my mum's sugi biscuits (which is vegetarian since no egg is used). We also dug out some of her older recipes and will try another time. It was VERY tiring cuz turns out most of the baking equipment at my mum's place is MIA, so i had to drive all the way home and pick up my mixer (the smaller kenwood) as well as my baking sheets, mixing bowls, flour shifter, etc ... I'm not leaving anything to chance since I don't want to drive to and fro (even though it's a 15 min drive away).
 
The best of the lot? My mum's sugi biscuits - plain sugi or with almonds. We decided not to waste my almonds and quicky toasted and coarsely chopped them, then add to the remaining sugi dough. The moment I held the Sugi dough in my hand, I went "this feels like it man! That sugi I used to eat!" When we were kids, we helped out with the rolling of the balls, and poking it with a chopsticks. We weren't allowed to eggwash the cookies :P
 
We took only a few pics (think my cousin) and i was already quite shack ... in fact, after everything was done and 80% was washed and cleaned, I flop unto the sofa and slept till my hubby came to pick me up (about an hour). I am still so sleepy. Going to call it a night and I'm looking forward to Friday - not for CNY but cuz they are making carrot / yam cakes! another of my FAVOURITES *slurp*

Monday, January 23, 2006

The Apprentice!


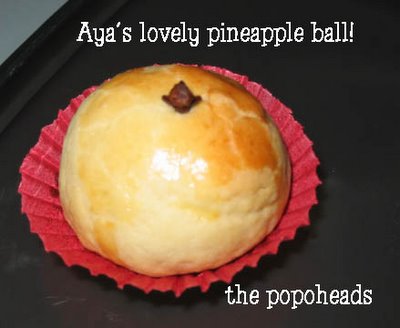
I hereby award the "The Apprentice" title to Aya, who is my one and only tudi! haha!

Here's some pics of her efforts to make her pineapple tarts! And I must say she is better than me cuz till now, I am still afraid to do the pastry by myself!

Isn't her pineapple tarts beautiful? =)

bottled up ...


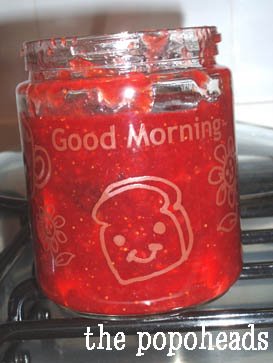
my finished product =) I like the bottle cuz it makes it look so cheerful!

psst! I added some vodka infused blackberries into the jam *rofl*

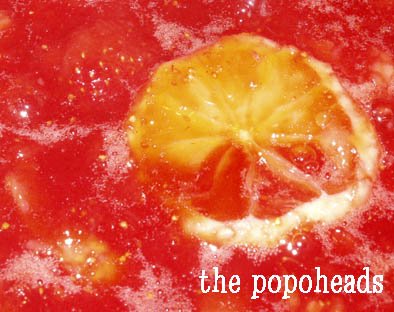
what's that bloody looking lemon slice?

Aya’s so smart =)


Ya … it is strawberry jam. I couldn’t resist making it after the compliments and the request for the recipe. Anyway I had to try it for myself since I’m doing it without the breadmaker!


I had about ½ of the required strawberries sitting in my fridge (was going to make alcoholic strawberries conserve :P) but I ran out of plain vodka, so while waiting for someone to donate me a bottle, the strawberries are just _sitting there_.


So *ahem* it was pretty quick, did it within the hour so it’s now sitting in a pretty Daiso bottle in my fridge!


It’s not as watery as the previous time, probably because I didn’t try to rub off all the seeds on the strawberries. The natural pectin required for it to set is contained in the skin, so this time I guess there was enough pectin to help set the jam properly.


A nice ending to the weekend J


Scroll down for the amended recipe. It’s in one of the post titled “Strawberry Jam”.

Sunday, January 22, 2006

what on earth ...?!?!?! Part II


Wana guess what it is? =)

What on earth ...!!!

Are you wondering what this is? Are you taking a double look and thinking to yourself, "does this look like a P*****?"

Then are you wondering, "Are you sick in the head, you pervert!"

Well, first question, Bingo, you got it correct. Wait, don't cover your eyes or rinse it with bleach yet!

Traditionally, when we make kok zai (mini puffs with peanut, sugar, sesame seeds and some stinky bug smell-alike leaves), we make some that looks like the male reproductive organ. This will be given to married couples, to symbolise the "gift" of a baby boy. They call it in cantonese a nicer name "Chee Gu Ting" which is actually the name of a plant's bulb.

Anyway, we also make some "treasure boxes" and the normal puffs. So, remember, you don't have to rinse your eyes with bleach!

Sorry, I went there too late to get the "secret" recipe of the peanut sugar filling!


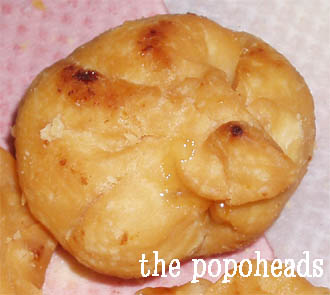
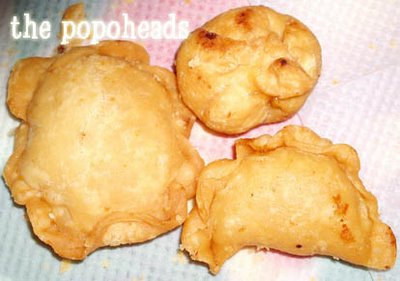
From left: "Treasure Box" Kok Zai, "Chee Gu Ting" Kok Zai and the normal Kok Zai.

Saturday, January 21, 2006

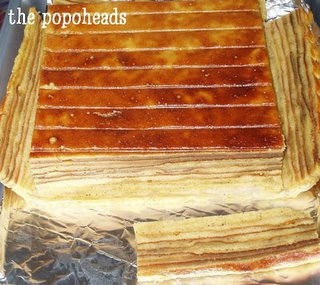
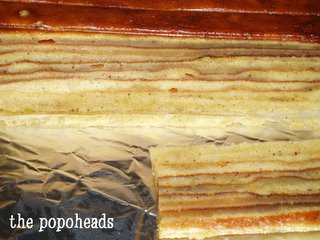
Tadah! Kueh Lapis from my oven!

Not quite perfect but I'll say a decent first attempt =) Taste wise it's quite quite good, but some part were yuckky ... i guess it was the water logged section :P silly me, i forgot which side was the part the water had seeped in. So i cut away more of the sides just in case...

here are the pics ... remember 1 scoop/ ladle ... not 2 or 3 at 1 time!

Should I sigh with relief?

Just went to poke the cake ... the edges seems 'crispy' so good thing is ... it's prob not water logged anymore ... but i hope it's not overcooked and become dry and yuckky ...

does that mean i have to buy another 30 eggs to have a go at it? pity my poor back =(

I certainly deserve the title of "the Queen"

of DISASTERS (yes in caps) ...

why?

well good news and bad news about my kueh lapis ...

good news is for all of you... the recipe works and it taste really GOOD (I can't help but scrape off the sides and eat it).

the BAD NEWS? my cake tin pan is NOT waterproof ... and so what? well ... see the recipe says to let it cool completely overnight right? I decided to put it inside my oven, but I am having an antsy problem lately so I decided to sit the cake pan on a bed of water ...

so now i have WATERLOGGED kueh lapis! thankfully or not, only half of the cake is affected ... so sigh ... I decided to pop it back into the oven on low heat (110 degrees celsius) for 1 hour to drive out some of the moisture ... hope it works =(

so remember what I did ... DON'T repeat it!

Friday, January 20, 2006

pics and pics ... part III

This is how my Kueh Lapis batter looks like, after adding in the egg whites and flour.


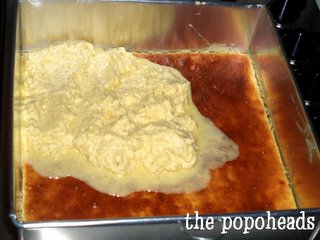
Please be forewarned. When adding new batter for the next layer, the heat from the bottom layer will cause the batter to melt (see below). It's ok i guess, just try to spread to the corners and let the heat take care of the distribution.


That's all for now folks!

pics and pics ... part II

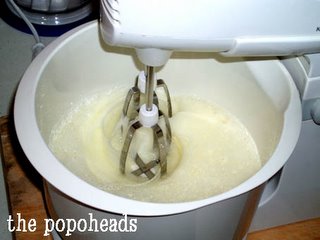
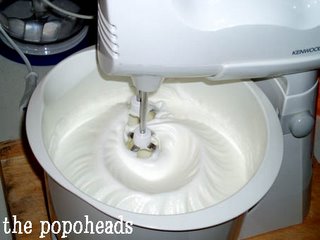
Beating the egg whites ... don't add the sugar yet! and make sure there isn't any one speck of oil or egg yolk in it!

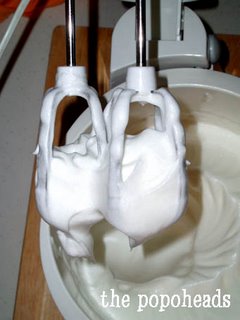
When it looks somewhat like this, add the sugar. The final product is below:

Can see how "stiff" it is on the spoon?

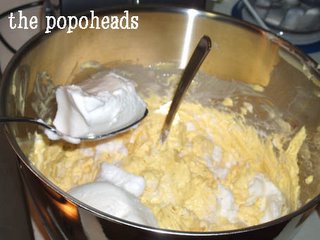
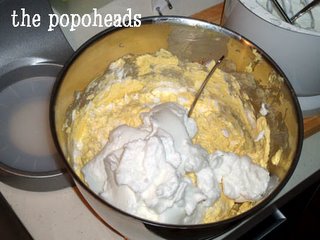
This is when I got tired of trying to fold in bit by bit and decide to dump the last half of the egg white into the egg yolk mixture! Don't follow me!

pics and pics ...

ok selected some pics to show you the process of doing it ... so at least you have some kind of mental preparation!

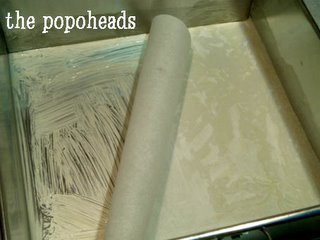
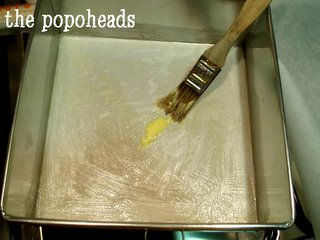
Greasing the base of the square tin pan. The greaseproof paper is on top of it.


Now that the greaseproof paper is over the first layer of the butter, smooth out any bubbles and apply another layer of butter over the paper.


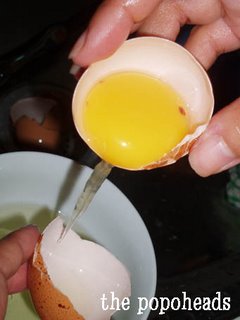
My ex colleague taught me the technique to seperate the egg yolk from the egg white using the egg shells - she swears that it's the easiest and best way to do it. I'll say less hassle and cheaper too! No need to be an egg yolk seperator! But it has it own drawbacks, especially when i accidentally hook a portion of the yolk sac over an sharp edge ...


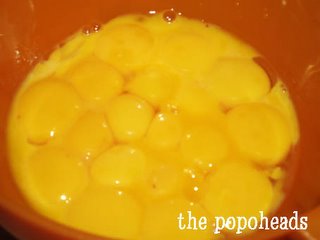
So, here's 20 egg yolks! More or less intact ;P (to be precise 18 intact yolk sacs and 2 broken ones).


to be continued ....

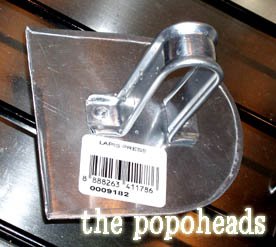
what is a kueh lapis press?

I knew you were going to ask that!

Anyway it looks like this

I got mine from Phoon Huat (again yes but I happen to be a member so I get like 5% discount on my purchases).

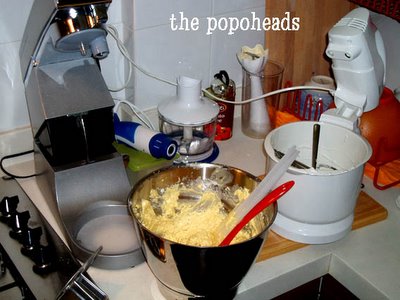
Also my baking equipment

From left: my Kenwood Chef Classic, my Braun handheld mixer, and my Kenwood mixer (I have it for about 10 years).

Better place to view them in all product marketing glory

Kenwood Chef Classic at here

Braun Handheld Mixer at here

My kenwood stand mixer ah ... I don't really know ... it's been such a long time! Sorry!

Kueh Lapis Recipe

Got this off a magazine which I really don't remember which one - only have the page that's torn off :P

Why I picked this recipe over others that I've found on the internet? Because:
1. It only required 20 egg yolks
2. Method of preparation I'm somewhat familiar other than the egg white bit
3. It comes with photo illustrations!
4. It gave some basic tips so I'm comfortable to try it out

Recipe for Kueh Lapis (adapted somewhat from my research)

Baking items required
1 Kueh Lapis press
1 25 X 25 cm square tin pan (i used 8 X 8 inch square tin pan)

Ingredients
500g butter
220g caster sugar
4 tablespoon condense milk
1 tablespoon rempah kueh (lapis spice) (I bought mine from Phoon Huat)
20 egg yolks
150g plain flour
6 egg whites with 90g caster sugar


Method
1. Preheat oven to 170 degrees Celcius.
2. Line the base of the cake tin with grease proof paper. Butter the base before laying the paper, and butter again on top of the paper.
3. Cream butter, sugar, condensed milk and lapis spice till fluffy and pale in colour.
4. Add egg yolks one by one (I had a pulse function on my kenwood chef classic so i used it when i added an yolk - really cool!). Beat on high speed when adding the egg yolk to prevent curdling. Set aside.
5. Using a clean stainless steel or glass bowl, whisk egg whites till glossy (with soft peaks forming). Add sugar slowly while whisking on high peak. Stop when the egg white is thick (can form stiff peaks). See *
6. Fold egg white into the butter mixture, followed by the flour.
7. Spoon one ladle (I used my soup ladle) of batter (it will be thick) unto the base of the tin and spread evenly. Bake at 170 degrees Celcius for 10 minutes or till surface is brown.
8. Remove cake tin from oven. Switch oven to grill mode.
9, Spread another ladle of batter on top of the first layer and grill top till brown (place on the rack nearest to the top - i used my 2nd rack since my tin won't fit into the first rack).
10. Remove cake tin from oven. Press the cake with the Kueh Lapis press to remove any air bubbles.
11. Spread a ladle of batter on top of the cake and grill. Repeat till the last layer.
12. The last layer should be slightly thicker than the rest - about 1.5 ladle full.
13. Grill till brown, remove cake tin from oven. Switch oven back to baking mode (top and bottom heat) and lower the temperature to 160 degree Celsius.
14. Cover the top of the cake tin with aluminium foil. Return cake tin to the oven and bake for 10 minutes.
15. Allow the cake to cool completely in the tin upright for ONE day.
16. On the second day, turn out and invert the cake. Keep in a box and stand for another day.
17. On the third day, invert cake and it's now ready to be eaten!

Note: I notice that while grilling, some of my bottom layers weren't getting "cooked" properly. So one of the layers, I put it on the 3rd rack (from top) and grill it. When no more liquid was oozing out after that layer, I returned back to the 2nd rack. I also baked the cake at the end for 20 minutes at 150 degree Celcius. But you have to wait for 36 hours before I can tell you if the cake is any good :P hang in there!

* if using plastic bowls, it tends to retain the oil very well. So you have to really clean it very very very well - no oil or any form of grease. Also make sure there's no speck of egg yolk in it too! otherwise it will not rise!

Strawberry Jam

I once made strawberry jam to give away to my colleagues and friends at work for Christmas a few years back. While they were very nice and appreciative that I made something for them, I thought they probably chuck it down the bin when I wasn't around.

Personally, I used my jam to make strawberry lemonade. Reason being it was very gooey/ watery - unlike traditional jam which is "solid". Also, I'm a "tarty" freak - as usual, i added much more lemon juice than called for in the recipe ...

Then, yesterday someone asked me for the recipe. Apparently his daughter liked it a lot! Wow! I feel so GOOD!

Anyway, for "prosperity's sake", I'll post the recipe here. I adapted it from my breadmaker manual, which had a jam making mode. So, if you have one like mine, just throw in all the listed ingredients and leave it do the work.

Else, just do it the manual way!


Recipe for Strawberry Jam/ Preserve

900g fresh strawberries
400g to 500g sugar (depending on how sweet you want it)
Lemon Juice – 1 tablespoon to 1 whole lemon (tartness based on personal preferences)

Method
1. Remove stems and hull the strawberries. Lightly crush 1/3 of the strawberries. Process the rest in a blender using pulse method or mash them (a potato masher comes in handy).
2. Place in large, heavy stainless steel or enameled pan over moderate heat. If using non-stick Teflon pan, clean thoroughly to ensure no residual oil. The presence of residual oil will spoil the taste of the jam. Heavy pans ensure the heat is evenly distributed over the base of the pan.
3. Let it boil and then add sugar. Stir and add lemon juice.
4. Turn flames to low heat and stir constantly till mixture thickens (approximately 30 minutes). Heat further if you prefer thicken constituency.
5. Let boil for 30 seconds.
6. Remove jam from heat and leave undisturbed for 10 minutes.
7. Pour into containers and let it cool.
Cover and Refrigerate.

IMPORTANT TIP: Choose strawberries which is firm and just ripe. Ripening reduces the pectin content of the fruit, which adversely affects setting of the jams. Wash the fruit as little as possible. If washing is necessary, drain thoroughly. Remove any damaged or mouldy fruit as some mould spores can survive the cooking

Tip: I used glass cannisters bought from ikea to store it. Clean and pour boiling water to "sterilize them". Else, I fill the cannisters1/3 full with water and microwave on high for 2 minutes. Drain well and air dry and use immediately. Daiso has prettier ones at $2 each.

the making of kueh lapis ...

it's actually not too bad ... though the fact that the recipe required me to whip egg whites and fold into the butter mixture was quite intimidating ... i've actually never ... NEVER ... done egg white before ... and to fold it in ... that's even worse ... i dun actually recall having to fold anything into a mixture before either ...

anyway i had 2 mixers ... and i decided to use my smaller one for the egg whites. it's plastic bowl so i had to take extra precautions ... cleaning and cleaning and cleaning ... making sure there's no speck of oil on the beaters or on the bowl ... and remember that i should only add the sugar after the egg whites look satiny or glossy (which by the way i can't really tell the difference!) i managed to make it!


the fact it's taking me slightly more than 3 hours doesn't mean that i'm making really many many layers ... i made a boo-boo ... i thought my scoop was small, so for every layer i made it 2.5 scoops ... so it's now a 6 layer kueh =P

it's now baking away in my oven ... hopefully it will turn out nice ... it's 20 egg yolks for goodness sake! here's a pic for you to drool over ...


more pics up later ... now i have sore arms and BACK ...

and i still want to make sugee biscuits tomorrow ... *howwwwww*

Thursday, January 19, 2006

time for kueh lapis ... and more!

I bought the necessary ingredients for my kueh lapis, including this tool to press the cake down ... so will work on it tonight and cross my fingers, that it will come out right ... the recipe is from Simply Hers (I think) last January edition ...

I've also bought semolina flour, and that goes into my sugee cookies (planning for tomorrow). Found this recipe and hope it works ... the reviews says crunchy but I don't seem to see any other recipes for melt in the mouth (i saw one in this cook book but it says to bake for 1 hour?!?!?! anyway i tried it and it was horrible).

my hubby's out tonight so no one's going to help me =(

Tuesday, January 17, 2006

Coming up next ... Kueh Lapis ...

I should start planning for my kueh lapis... I’ve already bought 30 eggs (recipe calls for 20 egg yolks and in case I accidentally break some), the spices and the square cake pan … what’s left I think is the butter (needs 500g which my fridge is currently only stocking 1X250g piece.

Oh darn, it means either I give up clubbing on Wednesday or pray my eggs will still be nice and fresh :P My fridge can’t take in all 30 eggs currently (it’s full of JUNK) … so *argh* need to decide soon … you must be mad if you think I’m going to try it tonight …

my guinea pigs ...

tested one batch of the almond cookies on my colleagues and apparently they like it! either that or they just trying to suck up to me *rofl*

someone just gave me 2 bottles of homemade cookies too ... the almond sugi cookies look really v good ... no way am i going to share with my colleagues!

kitchen gadgets!

I happen to be surfing for pineapple tarts moulds (in particular wooden ones - anyone knows where i can still buy them from?) when i came across this.

Just thought it was particularly interesting since i'm nuts about pineapple tarts now ...

http://www.pastrychef.com/Catalog/pineapple_corer_3152825.htm

*sigh* not quite the perfect cookie


ok this is the results of today's baking ... i somewhat envision it to be puffier .. but ah well, the ultimate judge is my mum, since i made this cookies especially for her ... if she likes it, then i'll post up the recipe ... else, it's back to the hunting game for a new almond cookie recipe ...

Monday, January 16, 2006

I must be mad ...

I am so tired ... YET I couldn't resist the lure of more biscuit ... my almond cookie dough is now resting in the fridge, while I hide in the air con room ... I made a silly mistake ... I added in HOT almond meal to my butter/sugar mix and so it went*splat* ... *sigh*

The weather is not helping either ... I'm grateful it's finally sunshine after so many days of rain ...but it's terrible ... there's not even any slight breeze tonight!

Thinking if I should go ahead with the baking or just take a break ...

Ok... gotta heat up more soup for my hubby ... it's herbal soup I made yesterday, so he's finishing up the leftovers for dinner (horrible aren't I :P)

the fruits of a 8 hour labour ...

spent 8 hours at my mum's place making pineapple tarts today ...

i must declare one thing ... the recipe we had for the pineapple tarts pastry ONLY works with SCS salted butter ... today we tried with Anchor salted butter and it was horrible! Somehow it didn't give enough moisture to the dough, so we sent our aunt out to buy 6 blocks of SCS butter ...

after that, the dough was back to the normal dough ... so much better to work with!

Anyway, just a quick one before I dash off to dreamland, these are the 2 versions of the tarts we did today.

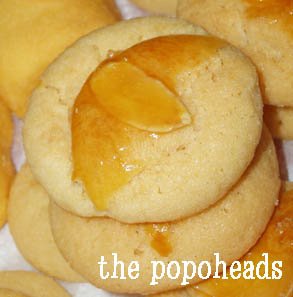
The open pineapple tart. The heart shaped decoration are handmade!


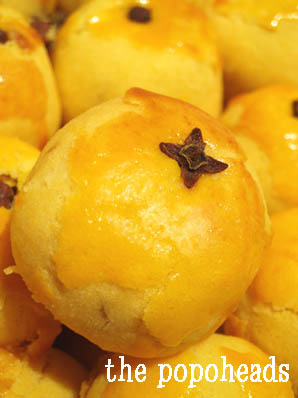
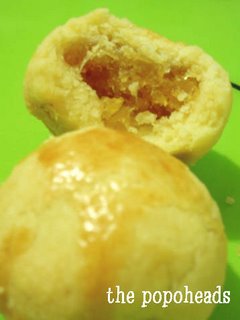
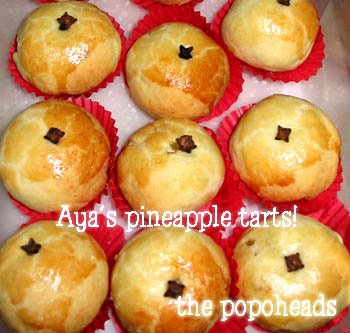
The pineapple tart ball (closed version) with a clove. This combine with the egg yellow colouring we added to the dough makes it look like "kumquats".

ok tt's all for tonight folks ... I'll show you the pics of the hums i had just before I posted this tomorrow!

Saturday, January 14, 2006

Sacrifice ...


hee ... I had to sacrifice my quest for a smaller waist to bring you this picture ... in case you were wondering what the heck is a pineapple tart ball =) these were made without sticking a clove on the top. They were just brushed with eggwash.

Breakfast with Love ...

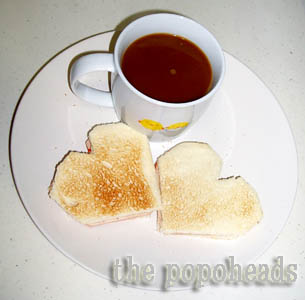
I made the ham sandwiches this morning for my sweetest hubby ... who has been working hard, and yet still have to assist me in my current madness for pineapple tarts ... Today as a reward, i let him sleep late and I woke up earlier (still it was about 10am...) to feed Rascal and bring him for his quick morning run ...

It was done on the spur of the moment, when I was lamenting what to do with the excess bread (we had the loaf in the fridge for almost 2 weeks!). I thought it would be sweet to do it as a gesture of gratitude.

Yes he's happy with it! Specially that I made coffee for him too ...

Friday, January 13, 2006

Crazy for Pineapples II ...

ok the details about cooking pineapple paste ...

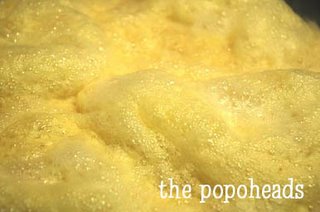
from this at 9:45pm

to this at 11:30pm

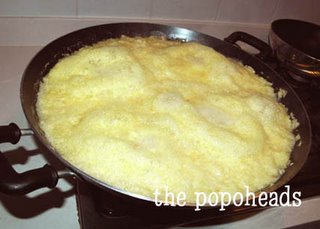
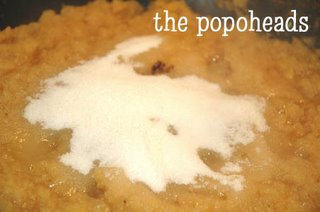
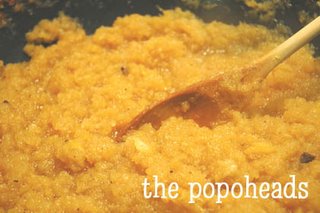
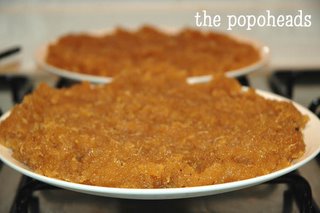
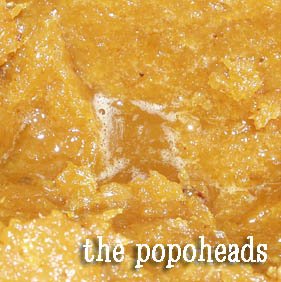
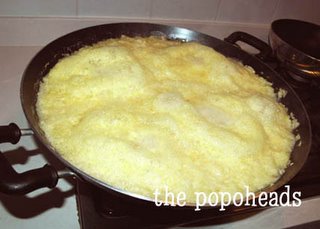
to this at 12:00am. it's almost dry ... notice the amount of liquid bubbling at the center?

then i add in the sugar and start the constant stirring over medium heat ...

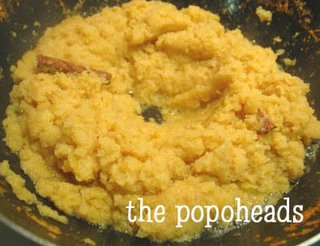
See how nicely it caramelised? This is about 20 minutes after I've added the sugar.

This is my greedy puppy, Rascal. Guess what's on his mind?


and he's decided to set up shop here in case he gets any goodies falling accidentally out of heaven ... he actually pullled his rug over!

and my poor hubby who had to helped me out, because i was complaining about my arms aching like mad ...

and the final end result the next morning? (Psst, this has been already somewhat air dried in the fridge!)

Thursday, January 12, 2006

*yawnz*

I finally finished making the pineapple paste at about 1:30am … will post up the pics later … right now just trying to keep my eyes open!

A few additional tips for making the paste:
1. When frying the paste, the perceived wetness of the paste is different when it’s hot and when it has cooled down. So stop when you are not sure, otherwise if the paste is too dry, it’s not very nice.


Note: If it has plenty of liquid still, it's NOT done yet ,,, back to the work for you unfortunately ... will try to post up the pics later ... was fast asleep last night - too tired to blog.

This has been cooked till sticky but still it's too wet ... the liquid in the center appeared in the paste the next morning i popped it inside the fridge. So I microwaved it on low heat for 20 minutes to dry it up a bit, stirred it well and back to the fridge for another session. This pic taken is of my 3rd batch (i went to buy 3 more pineapples!).

2. If it’s still too wet when it has cooled down, spread it on a flat plate and pop it overnight in the fridge to dry it somewhat. Then store into a covered container to prevent any further loss of moisture.

3. My sister was telling me that when using unripe pineapples, it leaves a “cutting” taste on the tongue. Hence the need to cook it longer over the stove, but I was really too sleepy to cook it over a low flame. If you have sensitive skin, do take note. My hands were itching after cleaning and cutting the pineapples.

Additional tip: When rolling the paste into balls for the tarts, wet your hands first. It’s much easier to roll into balls as the jam doesn’t stick to your wet hands.

Wednesday, January 11, 2006

Crazy for pineapples ...


I bought on impulse 7 pineapples from the market today ... It's much cheaper than what I paid for the last round ... $7 for 7 peeled pineapples ... Got my colleague to help me lugged back to office and my hubby came to picked me up after work ...

I started working on the pineapples about 930pm. Due to a sore right arm and a tendency to take short cuts, I decided to core the pineapples and use my handheld blender to do the job. I roped in my hubby to help work the blender while I core and chop up the pineapple ... Of course I threw in a sweetener ... More of the chocolate tarts I made, and more to come this weekend ...


It was pretty fast, within 30 minutes, all the pineapples were crushed and is boiling away in my 40cm tefal wok ... Update later again =) think it's going to be a sleepless night ...

Family Fun!

It was really fun to make the pineapple tarts yesterday as it was a family affair!

In fact, we even set up a little counter for my 4 yr old nephew, Asher, to help roll the pineapple paste into balls!

I lugged my mixer and all the ingredients over. Thank goodness I had 4 blocks of butter with me, we used up 3! And we couldn't make the open tarts because we couldn't locate my mother's ancient baking items (but we did find a really really old recipe sheet, dated 17/10/77 ... yeah 1977! for some nonya cooking recipes - will post it up later). So we made covered ones, pineapple tart balls! And *giggles* we didn't have milk powder, so we used pedisure vanilla child formula instead. Saved us the hassle of adding in the vanilla essense too!

All in all, the following family folks were helping out:

my brother helped to make the pineapple tarts balls, arrange them on the baking tray, brush with egg and watch over them while in the oven. At one point we all got too excited over the kids and we had 1 batch slightly burnt, but hey! It was really very crispy so it was quite yummy!

My sister in law helped to make the perfect pineapple balls (mine was exponentially increasing in size).

My sister made the pastry and taught me how to wrap it into balls (took me about 30 minutes to get the hang out it). She's the one who provided the pastry recipe too and it was really good!

My ma jie, the expert in making all things, helped out in everything, and in between cooking dinner for us!

Me ... well i did make the pineapple paste, and I did get around to learn how to do the pastry and wrap the paste into ball shaped ... so mine was more of a learning experience!

Last but not least, Asher, who helped out a bit before he got bored!

We were supposed to try 2 recipes for the crust but in the end, we just stuck to the one my sister had. So here it is!

Pineapple Tart Pastry (good for melt in the mouth and crispy version)
250 g / 1 cup salted butter (we used SCS brand) - softened
4 tablespoon caster sugar
1/4 teaspoon vanilla essence or vanillin powder
2 and 2/3 cups cake/ plain flour
2 tablespoon milk powder
1 egg yolk

Method
1. Preheat over to 200 degrees celsius (180 if u are using fan assisted).
2. Mix butter and sugar together, with a wooden spoon or mixer. Add vanilla and continue to mix till mixture is white and fluffy.
3. Add the flour bit by bit (i used 1/3 measuring cup), and mix with butter mixture after each addition.
4. When adding the last cup, cut the flour into the mixture with a wooden spoon or by hand (make it crumbly). Add the milk powder and mix well.
5. Add egg yolk to bind the crumbs into a soft dough. If the dough does not hold (too crumbly), add some milk by per tablespoon till you get it to hold together.

To make pineapple tart balls
1. Take some dough and roll it into a ball.
2. Press your thumb into the center till you get the thickness you desire. Then using the thumb and the index finger, press the dough into a bowl shape and add pineapple paste inside.
3. Fold and cover, pinch off the excess dough and patch up the seams with your finger.
4. Gently roll the ball inbetween the hands to achieve the roundness.
5. Press a clove on the top and brush it with egg yolk. Done!

Bake it for 15 to 20 minutes, depending on the size. If you like it crisper, then you have to bake it longer, and turning down the tempature to about 180 degrees celsius (160 if fan assisted).

Notes:
1. I had used 5.75 pineapples to make the tub of pineapple paste, and we need 2.5 amount of the pastry to make all the tarts. We made about 300 tarts I think?
2. If you have left over pastry, just cut out some dark chocolate squares or chocolate mint and wrap it up. It tastes yummy too!
3. If rolling the dough out to make open face tarts, you can used the shortcrust pastry method, which is to cut the cold butter into small pieces, then cut in the sugar, followed by the rest of the ingredients in order as listed. Egg yolk to bind so use hands. Else the same method as above, but put a damp cloth over the bowl containing the dough and put into the fridge for 30 minutes before using it.

Have fun!

Sunday, January 08, 2006

Where is the recipe for the tart pastry?

Er for those who are asking me about the pastry ... I have yet to try it out ...
 
the problem is ... I like it crispy, my sister likes it melt in the mouth ...
 
I have 3 recipes on hand but we will do 2 only.
 
After we have tried it out, I'll post the verdict on the pastry as well as the recipes.
 
Wait for it =)

Recipe for Pineapple Tart Paste

Ingredients
100g of sugar to one pineapple (need about 6 pineapples - but can spilt into batches)
1 stick of cinnamon, 1 star anise and a few cloves (for each batch of grated pineapples)

Method
1. Grate the pineapple and keep the juice.
2. Boil pineapple and juice on high heat with cinnamon, star anise and cloves, until it is almost dry (don't let it get burnt).
3. Add in sugar and stir continuously over LOW heat to prevent burning, until it dries up into a wet paste.
3. Cool the jam down and keep it in the fridge for one night to dry it sufficiently to be rolled into balls for filling of the tarts.

Tips
1. Get unripe pineapples to get the tarty (sour) taste. If you like it sweeter, add 20g extra per pineapple. If using sweet Sarawak's pineapples, test before adding sugar, you may need less.
2. If fruit stalls are available, get the ready cut ones if you want less hassle to cut and clean the pineapples. Tell them you want the local ones and not so ripe ones. I rather pay a bit more than to clean up after the mess and with sore and cut hands (i tend to be rather clumsy and accidental prone). Note: I was just told that the fruitseller in the wet market does the peeling of the fruit, and will cost only about 70 cents per peeled pineapple.
3. Grate the pineapple and save the cores. Don't grate the cores as well as it will add lots of hard fibres in your paste! Juice the cores (squeeze if you want less work) to obtain the juice and add to the grated pineapples.
4. I use a non-stick pans to do the frying, so if using otherwise, you have to cook it over medium heat and keep stirring.
5. Make sure the cooking utensils are FREE of residual oil. Any residual oil from previous cooking will make your pineapple paste taste rancid!

Smell the New Year ... Resolutions!

After 10 years of ... er ... sleeping, I've decided to make a "come back" to my few real passions in life - Baking.

One of my resolution for the new year was to document down all the yummy food I have been eating at my mother's house for all these years (my ma jie is the actual cook, and my mum is the actual baker). I want to keep an archive of both homemade dishes, as well as traditional dishes.

As for baking, I was searching for pineapple tarts recipe (just for fun actually) when I stumbled upon The Skinny Epicurean's blog (http://skinny-epicurean.blogspot.com/). It suddenly reminded me how much I used to love baking - taco breads for my late dad, prune butter cakes for my sister, crunchy gingerbreads and my notorious Black Death (chocolate) cookies.

In my early years, no one - NO ONE - ever wanted to eat the stuff i made, except for my loving dogs (and only one of them ate it). Along the way, I got better because I LEARNT how to read recipes. And I had more "willing" food testers. Now, I have a ready one at home, my hubby (the greedy one too), so I'm ready to start!

And the first smell for the new year - pineapple paste for pineapple tarts!

Spent 4 hours making the paste from 5.75 pineapples (2 batches) and so far so good. The taste is just what I like - tarty, not too sweet and a hint of spices (cinnamon, star anise and cloves). This tuesday I'll be making the actual tarts with my sister ... I can't wait!

Next on my list - almond cookies. Why? Because my mum loves them, and I used to make them for her (no artificial almond essence - they taste of cockroaches!).

Then maybe peanut cookes - we modified this recipe from a website and we love it! And it was my hubby who made the changes accidentally - I hope he remembers what he did!

and and ... chocolate cakes ... chocolate tarts ... and and ... oh! I should start making a list!